

You can tell prospective clients all about your years of plastic surgery experience, your high standards, your superior medical training, your state-of-the-art equipment, and your 100% satisfaction rating, but none of those statements will be nearly as effective as showing them excellent before-and-after photos of your patients.
Clients visit plastic surgeons’ websites to see evidence of their work, and “the first place they go is the before-and-after photos,” says Tom Bialoglow, professional medical photographer with Canfield Scientific.
Besides providing proof of your skills, photos are also your legacy, building a record of the many clients you’ve helped. You can only do that, however, if you’re consistently taking photos before and after procedures. So whatever you do, start taking them now, not later.
There are a number of factors that determine whether the photos you take will help or hurt you. High quality images will help establish your expertise and attract new clients, while poor quality, low resolution images, may cause potential clients to continue looking for a surgeon who inspires confidence.
When taking photos of clients, follow the simple guidelines below to ensure the photos you take help seal the deal.
The Key to Consistency
To make results crystal clear to potential clients, it is essential that all of your photos have a standard appearance. That means that these are the same in every image:
- Client pose
- Background color
- Focal length
- Distance from the camera
- Lighting
- Outfit
Achieving consistency is easier than it sounds if you can set your camera and tripod up in one spot and leave it there. That way, each client photo will be taken from the very same vantage point every time.
If you can’t dedicate one area of your office to photos, consider painting one wall a light blue – as the background color – or invest in a hanging fabric backdrop. To ensure that all clients stand in the same place for their photos, you can put marks on the floor using tape to indicate where to position the tripod and where the client should stand or sit.
When taking photos, you want to frame your photo tightly on the subject – meaning don’t leave a lot of space around the client’s head or body. Make sure the camera is focused and if you’re not sure, take several shots at the same angle.
Ideally, you should take at least five photos, both before and after, at five angles, from left profile to oblique, to center, then oblique, and right profile. Some procedures may require a 360-degree view, or images from above and below. Take more photos than you think you may need, since you can’t go back later and take more “before” shots after surgery.
Setting the camera to record the date on the image can help you remember the patient and document the time lapse. Another trick for identifying patients after the fact is to “bookend patient images with a picture of their name from their chart,” advises Bialoglow. “That helps make it much easier to identify the patient.”
Besides the backdrop and camera position, it is also important to have the client remove all makeup, jewelry, and clothing. Use modesty garments to enable close-ups of sensitive areas or wrap a gown around a patient, under their arms, when photographing heads and shoulders. A headband helps pull hair back and off the face.
Do all that you can to ensure that clients’ before and after views look exactly the same except for the work they had done.
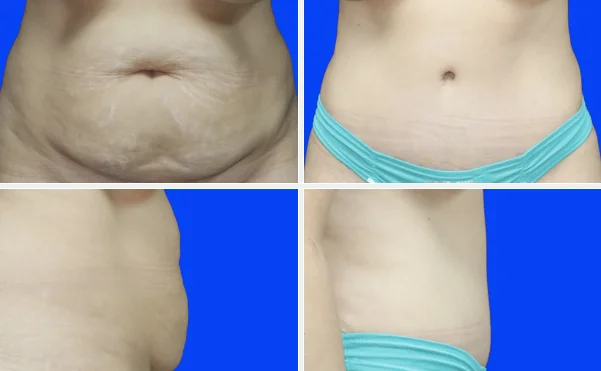
Tummy tuck before and after photos, shot with a Canon EOS SLR camera. Notice the tightly-cropped framing, uniform lighting and background. Photos courtesy Dr. Gary Breslow.
Buying Better Photo Equipment
While consistency doesn’t cost you anything, camera equipment will. Fortunately, it will be worth every penny. “If you’re taking photos with an iPhone, you’re doing yourself and your clients a disservice,” says Bialoglow. A good camera will help showcase your hard work, while a smartphone or cheap camera will make it harder to spot.
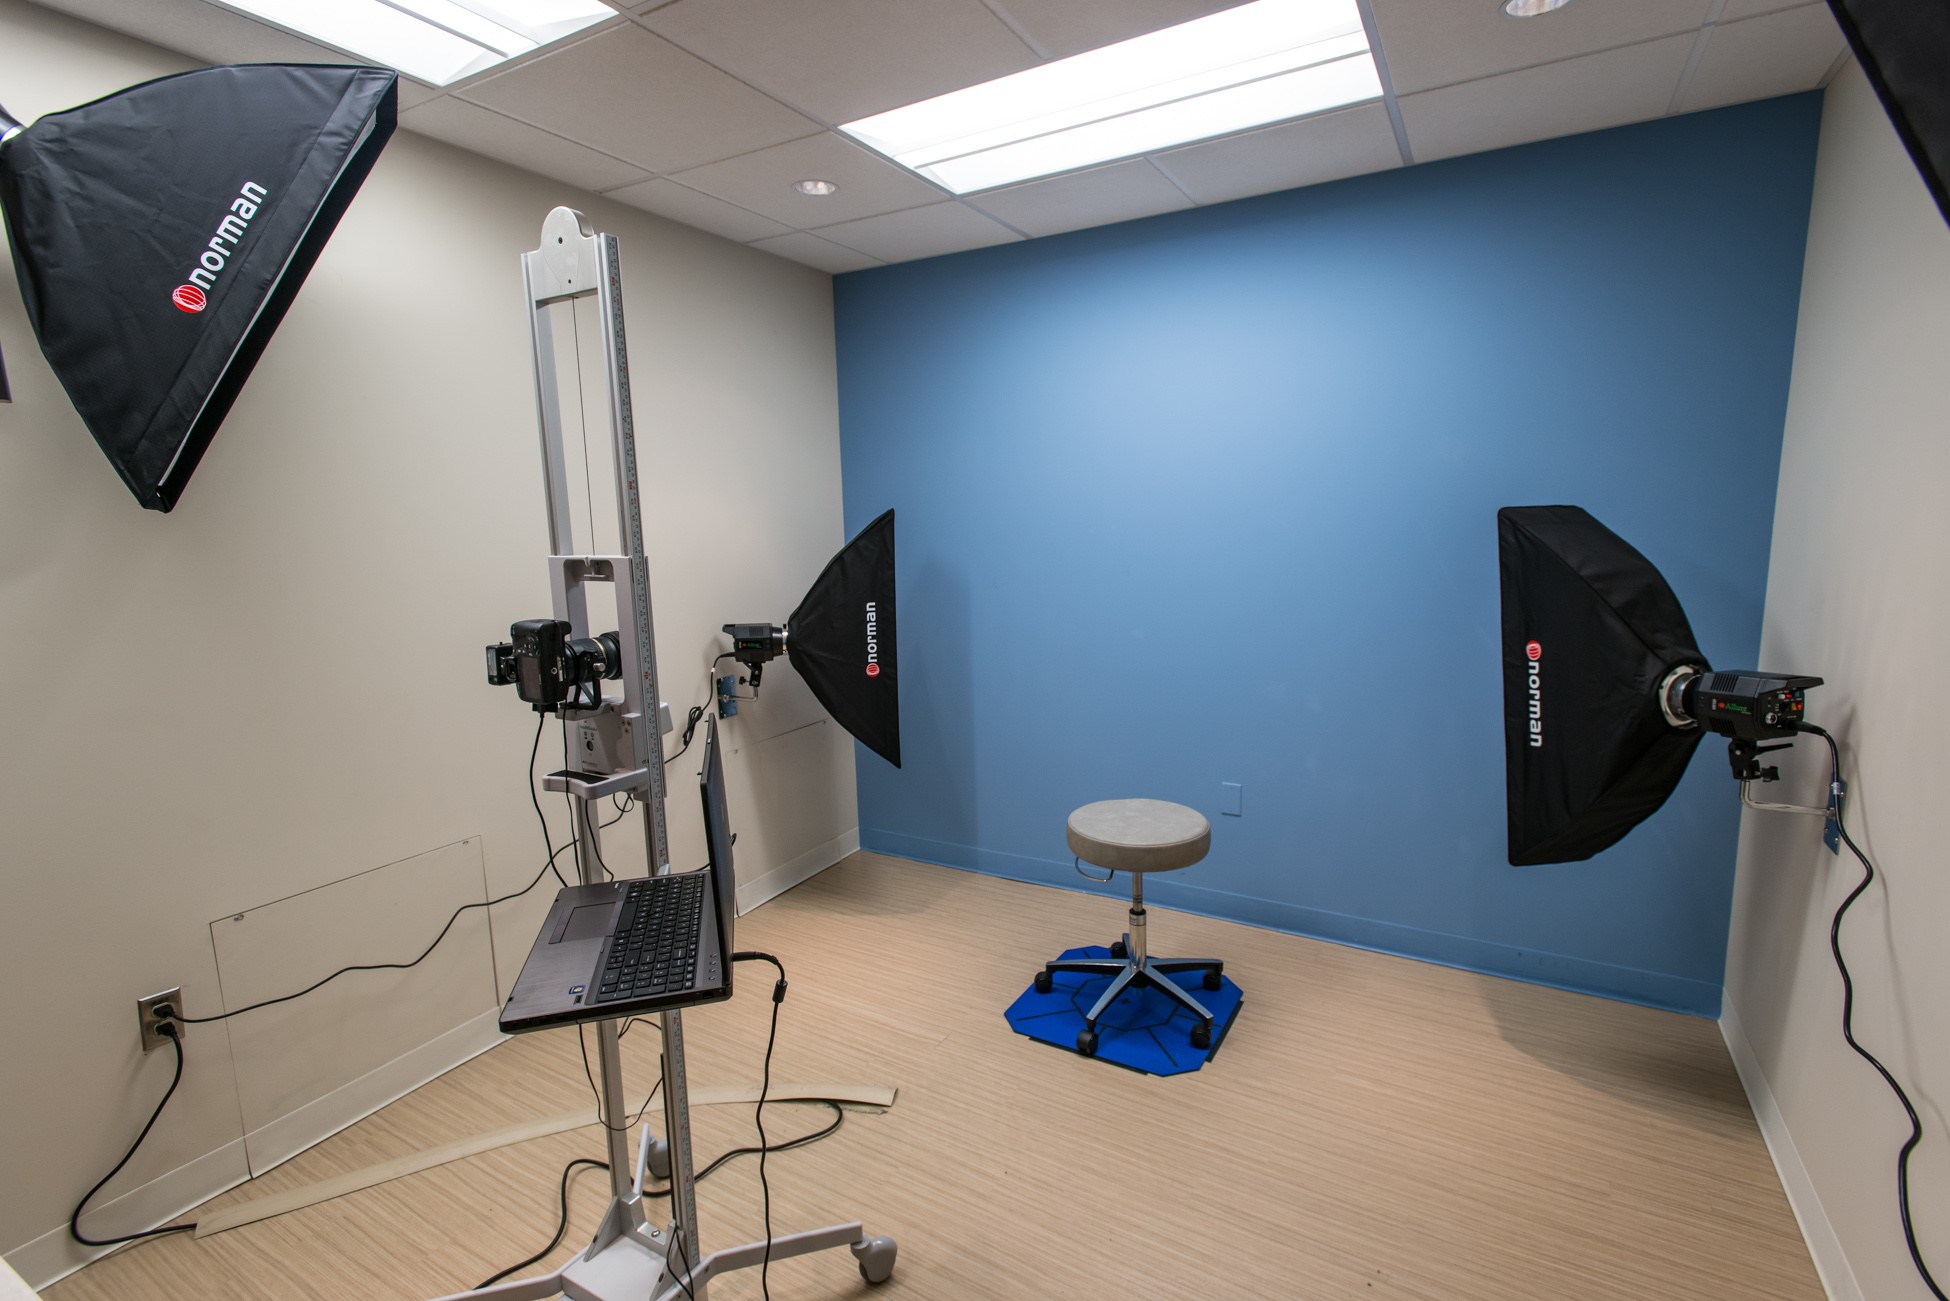
Some of the camera equipment Canfield recommends include the Canon SLR and Nikon SLR. Point-and-shoot cameras can also work, says Bialoglow, although “the best way to standardize photography is to invest in a photo studio.” The cost for a typical photo studio, which includes the hardware and software required to control the camera, ranges between $8,000-13,000.
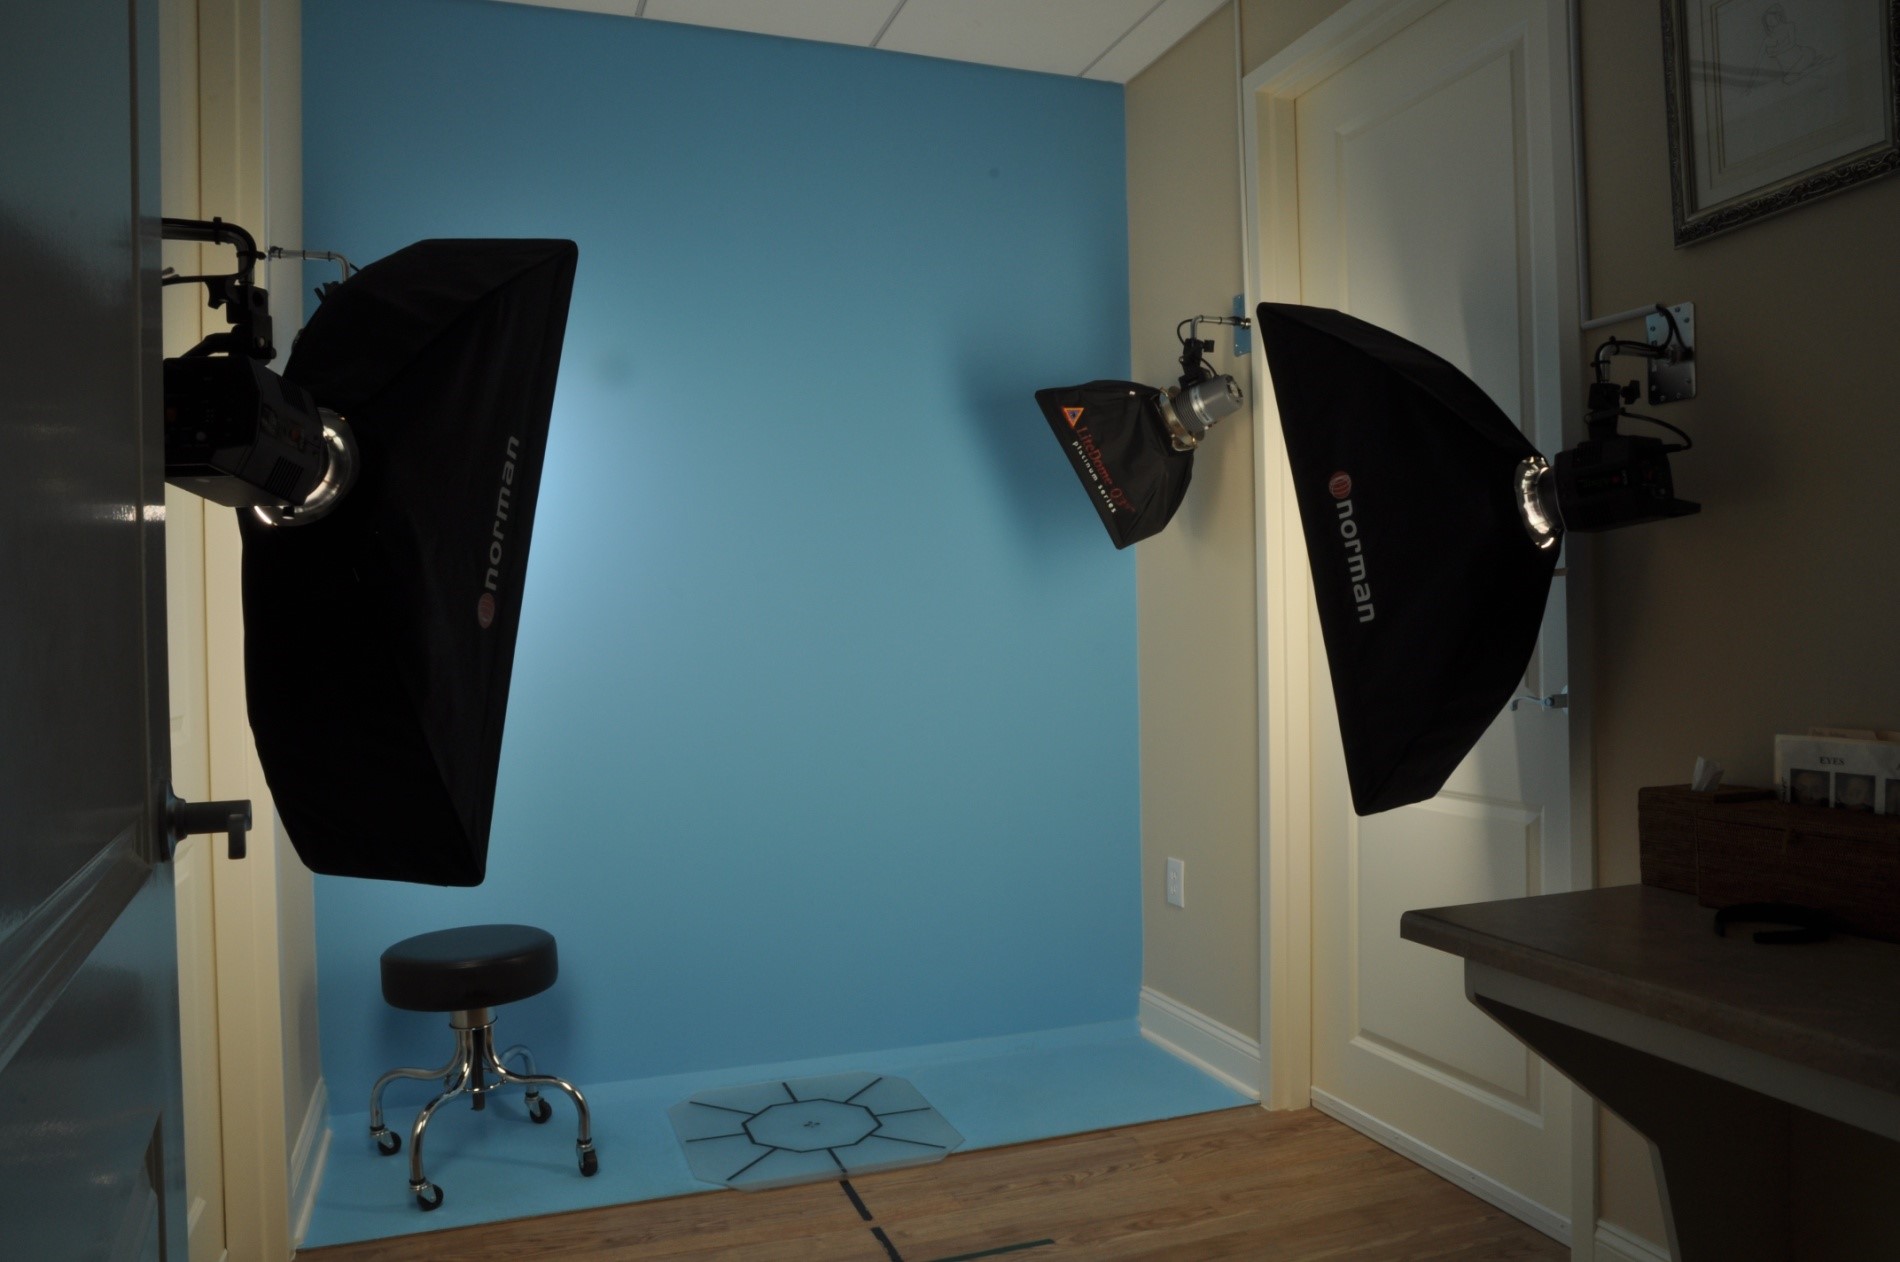
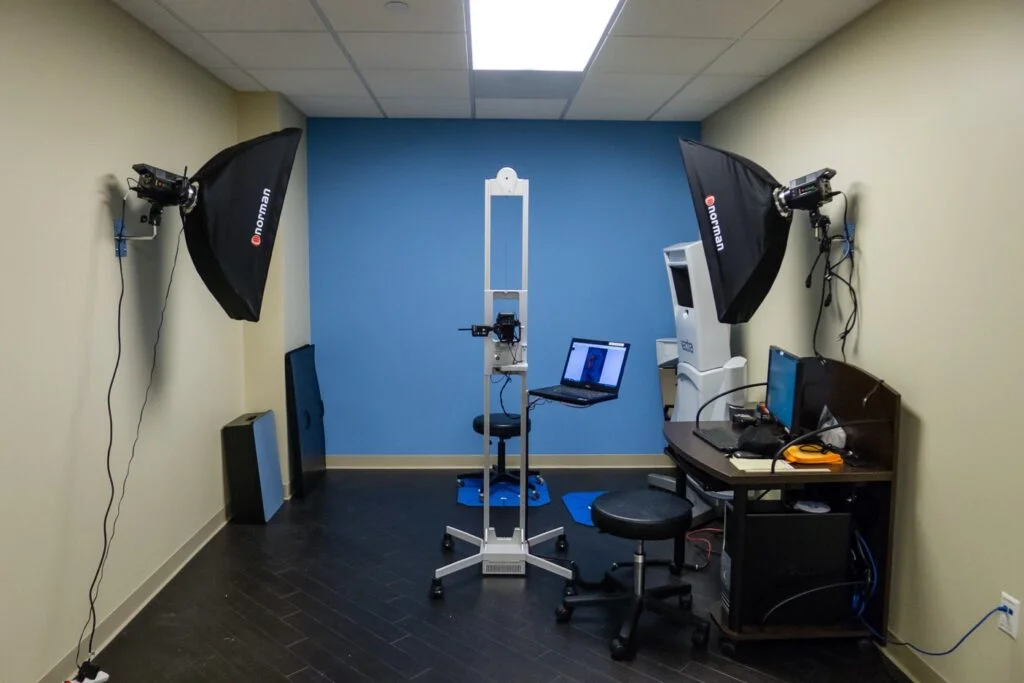
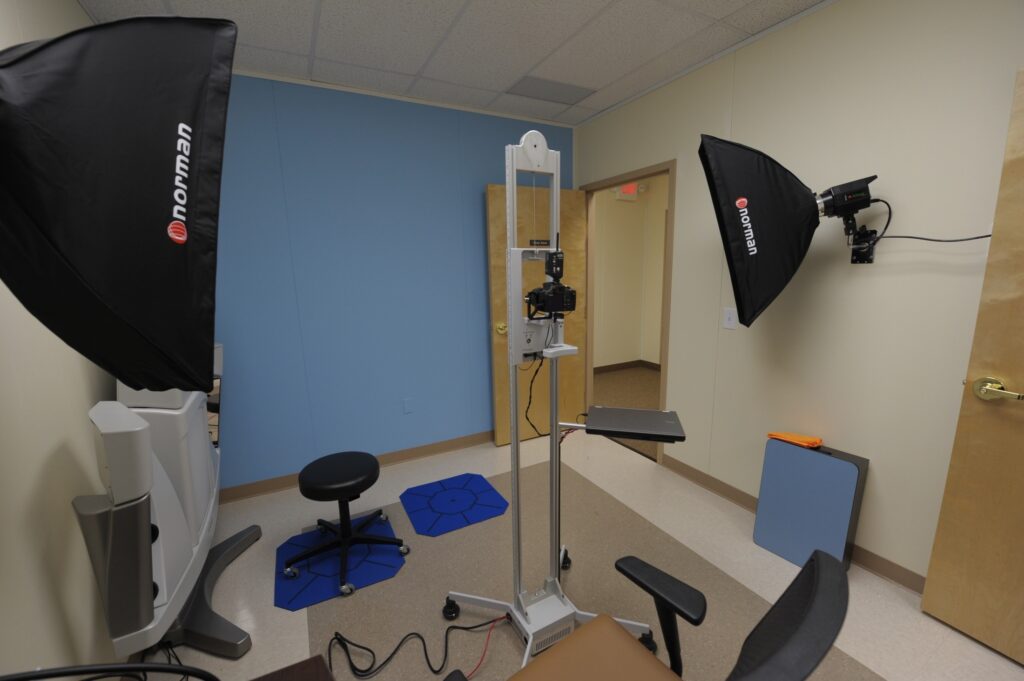
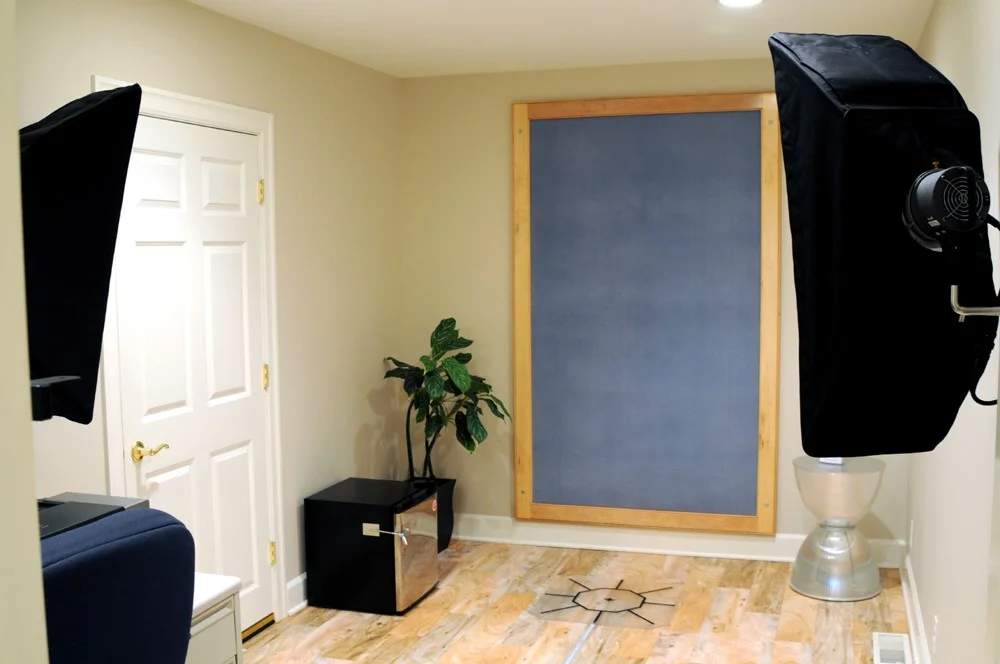
Examples of cosmetic surgery practice photo studios, courtesy Canfield Scientific
The Lighting Trick
One thing that will always make or break you is your lighting, no matter how much you’ve invested in camera equipment.
The biggest challenge with lighting is the shadows it can create on your client and behind them. Shadows are distracting and distorting, so you want to work to eliminate them – shadows can make features, such as folds or scars, appear worse than they really are.
The best way to get rid of shadows is to always use a flash with your camera. Adding an external flash will help even more, although the best set-up is a studio lighting kit, which places a monolight on each side of the client. If you have the client stand about 24-36 inches from the backdrop, you’ll also minimize shadows behind them.
Once you find a setting that works for you, document it so that you can keep all your photos consistent-looking. It’s best not to rely completely on natural lighting from a window, cautions Bialoglow, since different times of day will produce different lighting effects, which can impact your photo.
Creating a Suitable Environment
Although you’re focused on creating conditions to take top quality photos of your clients, keep in mind that they may be uncomfortable – literally and figuratively. To reduce goose bumps, kick the heat up a notch in the room where you’re shooting. Make sure the client has privacy, and be sure to get a client consent form signed before you start snapping photos. Confirming that you have permission to take before-and-after shots will reduce any chance of a misunderstanding.
Bialoglow has seen rising interest in improving photographic quality in the last two years. “It’s becoming more important than ever that you take good photos,” he says. Besides the obvious marketing benefits for your practice, adequately documenting your procedures will make it easier for you to communicate expected results to prospective patients.
Recommended Cameras for Your Before and After Pictures
The most effective strategy for plastic surgeons to promote their work is to upload before and after images of their patients onto their websites or social media channels, which is why it’s worth investing in a quality DSLR camera.
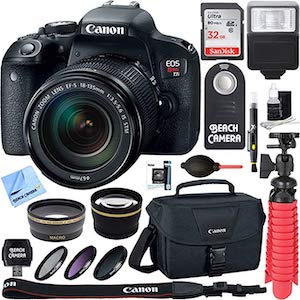
Canon EOS Rebel T7i Digital SLR Camera
Take your before and after pictures to the next level with the Canon EOS Rebel T7i Digital SLR Camera. With its 24.2 megapixels, you can capture your work in vibrant colors and crisp details. The 25600 ISO also allows you to take photos in low light with minimal chance of blur. Built-in Wi-Fi, NFC, and Bluetooth connectivity allow you to upload these images directly to the web.
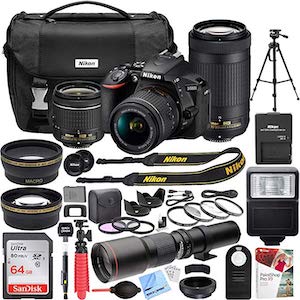
Nikon D5600 DX-Format Digital SLR Camera
Your images will surely stand out after they have been captured with the Nikon D5600 DX-Format Digital SLR Camera. Unlike many cameras, it has a battery lasting over 970 shots per charge, so you will have the opportunity to shoot all day long.
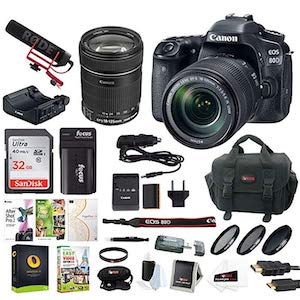
Canon EOS 80D Digital SLR Camera
The Canon EOS 80D Digital SLR Camera can be used to shoot photos and high-quality videos. If you are looking to use video in your marketing strategy, the camera has a built-in wireless connectivity and can shoot Full HD 60p movies that can be saved as MP4s for quick and easy sharing.