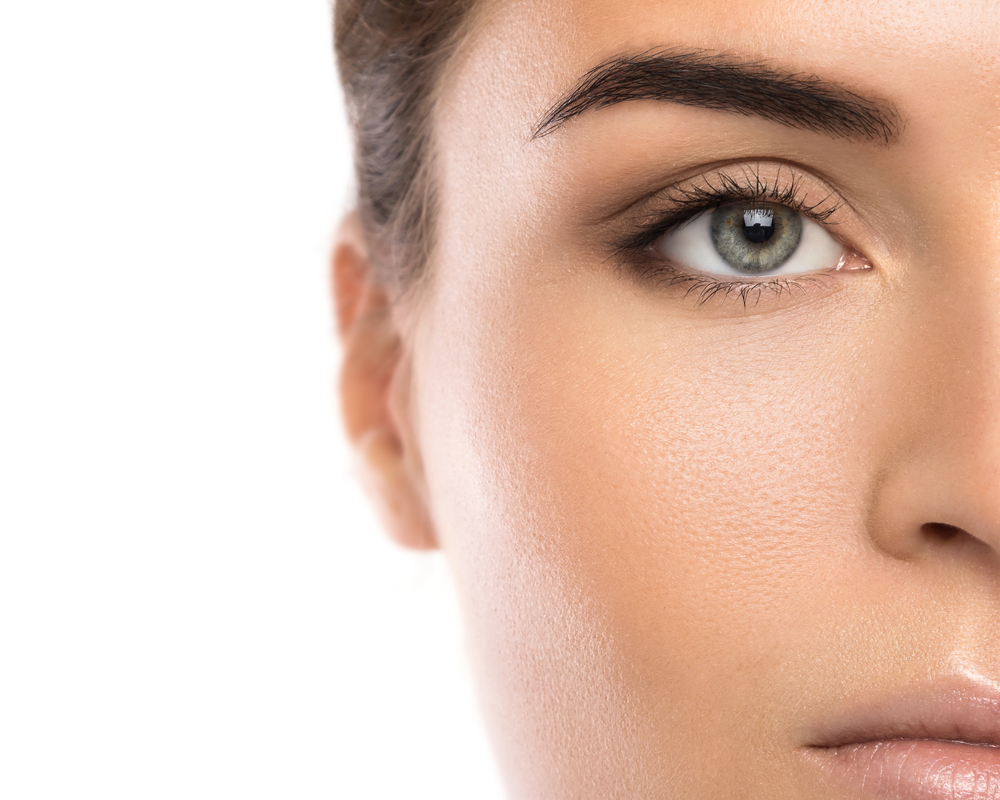


Microneedling is a cost-effective and non-invasive procedure that addresses an impressive range of skin concerns. Treatments can be performed either at home or by professionals, using various devices and techniques. This guide outlines everything you need to know about microneedling and its benefits.
What Is Microneedling?
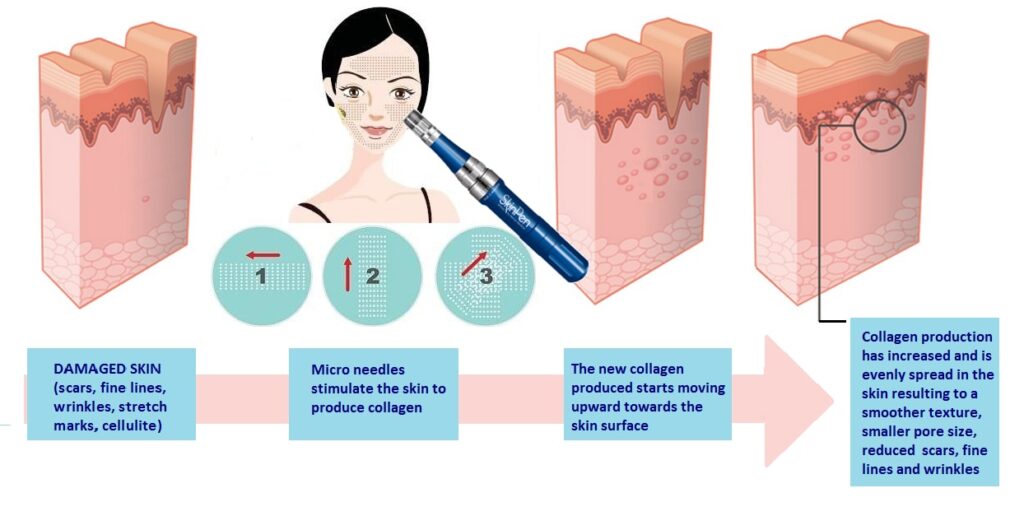
Microneedling therapy, also known as skin needling, collagen induction therapy (CIT), or percutaneous collagen induction (PCI), is a minimally invasive cosmetic procedure that helps rejuvenate the skin and minimize the appearance of scars and imperfections.
Dozens, and in some cases hundreds, of tiny needles are pressed against the skin, painlessly piercing its outermost layers. This method of “controlled injury” forces the skin to react by thickening and producing more collagen, the skin’s principle “stretchiness” protein.
This increase in collagen production smooths the skin’s texture, filling in fine lines and plumping the skin.
Several different devices and needle lengths can be used to perform the actual treatment, each with their own advantages and disadvantages. That said, regardless of the specific device you select, the technique essentially remains the same.
A Little History
The concept of needling the skin has been present for hundreds or even thousands of years, dating back to ancient cultures. Evidence shows that the Chinese, Indians, and Egyptians had all explored microneedling to some degree. Of course, the procedure used today is predicated on modern, science-based concepts.
The advantages of modern microneedling were first discovered, completely by accident, by Dr. Andre Camirand in 1996. He had been trying to camouflage enlarged, hypertrophic scars on a number of his patients by tattooing pigment into their skin.
Over the course of a few years, Dr. Camirand started to notice that the tattooed pigment was completely dissolving and being replaced by actual melanin, the skin’s natural pigmentation. Furthermore, the scars themselves were showing a huge amount of improvement in texture, appearance, and color.
This discovery led to the idea that puncturing scars with a tattoo gun, but without adding any color, could break down some of the tissues and materials inside them. This, in turn, would cause the scar to fade in appearance and naturally change color to match the skin’s tone. The results of multiple sessions were found to be remarkably consistent, with all of Dr. Camirand’s patients benefiting significantly from the treatment.
Shortly after Dr. Camirand’s discovery, Dr. Des Fernandes, a plastic surgeon, introduced his own skin needling technique: a small needle stamp. He used the device to successfully stimulate the production of collagen in the skin. Dr. Fernandes presented his first paper on skin needling, specifically to treat the upper lip, at the 1996 International Society of Aesthetic Plastic Surgery congress in Taipei.
Dermal rollers were invented a few years later. Initial sales began in Asiatic regions, where needling was not a foreign concept, but the device rapidly gained popularity and acceptance as a device with medical benefits around the world.
The Benefits of Microneedling
As Dr. Camirand first discovered, creating tiny, controlled puncture wounds in the skin causes the body to respond by producing new collagen and elastin protein. Basically, the objective is to deceive your body into thinking it’s been wounded, which results in a thickening and overall improvement of the skin’s texture and appearance.
Although microneedling is most often used on the skin of the face, it can be used elsewhere on the body as well, namely to treat loose skin after pregnancy. In fact, microneedling can be used on the abdomen, buttocks, love handles, inner thighs and arms, as well as the back of the thighs.
After treating these areas you should notice the following benefits:
- Thicker, firmer skin
- Increased smoothness
- Increased hydration
- Better microcirculation in the skin
- Reduced appearance of common skin imperfections
Microneedling can also be used to painlessly administer transdermal drugs (medications that pass through the layers of skin to reach the bloodstream) like vaccines.
Microneedling vs. Lasers and Other Treatments
Microneedling presents several advantages over other skin rejuvenation treatments.
- With a lower risk of hyperpigmentation and scarring, it’s safer for darker skin tones than many other skin-rejuvenating options, particularly those that are laser-based.
- Microneedling is suitable for thin and sensitive skin types.
- Extensive specialized training or expensive medical instruments are not required, which means the treatment can be performed in an office setting, even at home.
- Microneedling is very cost-effective, and can be used on areas that chemical peels or laser resurfacing are unable to treat, such as around the eyes.
- Unlike ablative resurfacing techniques, which literally remove the outermost layers of skin, microneedling leaves the epidermis intact. This means the treatment can be repeated as needed.
- Some other treatments leave a distinct line between skin that’s been treated and the skin that hasn’t been treated. There’s no such line of demarcation with microneedling, meaning specific areas of scarring can be targeted without the need to “blend” the edges of the treated area.
- You can resume your regular activity schedule within days, depending on how deeply the needles have penetrated your skin. Many other treatments with similar results, like laser resurfacing or dermabrasion, have a much higher complication rate and a longer recovery period.
- The procedure is easy, and well tolerated by the vast majority of patients.
Needle Lengths: At-Home vs. Pro Treatments
The needles used in microneedling come in a variety of lengths and sizes. All needle sizes inflict injury to the skin, but it’s the length of the needle and the corresponding depth of the wound that determines which condition it treats best.
It’s important to know what each needle length is used for so you can make an informed decision when choosing one for your own unique goals.
Generally speaking, microneedling can be broken down into three categories: cosmetic, medical, and surgical, all depending on the length of the needle used.
- Cosmetic Needling — The shortest category of needles, ranging in size from just 0.1 to 0.5 mm in length, don’t penetrate deep enough to catalyze collagen production. However, with this needle length no anesthesia is required, and you can even do this variety of microneedling at home. These short needles are ideal for treating superficial fine lines and wrinkles over time, as well as improving the absorption of topical creams and lotions.
- Medical Needling — With needle lengths ranging from 1mm – 2 mm, you can expect them to reach into the papillary dermis. This is the uppermost layer of the dermis, the layer of skin below the surface layer, called the epidermis. This means they can help increase collagen production. A local anesthesia is often used, and the procedure is performed on an outpatient basis. There are home tools available with needles this length, but professional care is advised.
- Surgical Needling — This is the longest category of needles, extending to 3 mm. This means these needles can reach all the way to the reticular dermis, which is the lowest layer of the dermis, or the subcutis, which is beneath the skin entirely. Surgical needling can’t be done at home, and requires a general or local anesthesia.
Frequency of Treatments
Not only does the length of the needle determine what skin problem it can best treat, it also impacts on how often you can perform the treatment.
0.1 – 0.25 mm
Use frequency: Every or every other day
What it treats best: Allows for better absorption of topical skincare products. This needle length isn’t long enough to cause an increase in collagen production. It’s useful to think of it as an exfoliator.
0.5 mm
Use frequency: Once every 3 weeks to begin with, increasing to once a week after several months.
What it treats best: This is the smallest needle length that will promote collagen production. That makes it the most comfortable and popular option for anti-aging, as well as improving texture and firmness, and treating mildly sun damaged or aging skin. Consult with a professional before attempting to use any device with needles longer than 0.5 mm at home.
1.0 mm
Use frequency: Once every 5 to 6 weeks.
What it treats best: 1.0 mm needles are recommended for the treatment of facial acne scars, skin pigmentation issues, stretch marks, sun damage, fine lines, hair loss and individual deep wrinkles.
1.5 mm
Use frequency: Once every 6 weeks.
What it treats best: This length is best for scarring on the body, stretch marks, and cellulite. This length of needle is rather uncomfortable but necessary to break through the thicker layers of the deeper dermis to stimulate growth and improve the impact of topical medications. Never use this length on your face by yourself.
2.0 – 3.0 mm
Use frequency: As determined by a professional.
What it treats best: These needles are designed for deep scars and stretch marks, and should never be used at home.
Microneedling with a needle longer than 0.5 mm can be repeated safely every 4 to 6 weeks until you finally reach your desired goals. For collagen stimulation it’s usually recommended that you start with three treatments, separated by a minimum of 4 to 6 weeks. For reducing scars, an average of 3 to 6 treatments is suggested. Ultimately, exactly how many treatments and how long they will take will depend on how your skin responds to the procedure.
Microneedling at home with a needle shorter than 0.5 mm is considered safe and remarkably painless. There is absolutely no downtime whatsoever, and you can even apply as much pressure as you’re comfortable with. When added to your usual routine, you can achieve impressive results by repeating 3 to 5 times a week. However, we recommend you first find out if at-home microneedling is right for you by consulting with a medical professional.
Microneedling Devices
While the length of the needles is the most critical element of any microneedling treatment, there are a number of different devices and brand names to take into consideration.
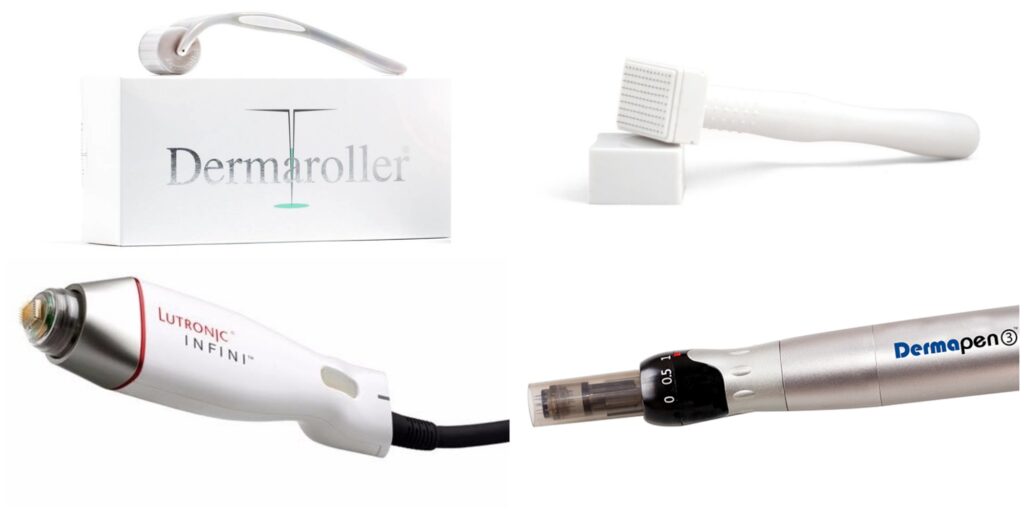
Rollers
A microneedling roller is a very simple device. It’s a small, handheld tool that vaguely resembles a small rolling pin covered with needles. The pin is simply rolled over the skin, allowing the needles to break through the surface. This tool is better suited for treating large areas. There are both professional and at-home versions of this device.
- Dr. Roller Derma Roller – Using 192 sterilized needles and an ergonomic handle, this is a popular brand for at-home use.
- MT Derma Roller – This brand is often considered one of the best because of its low price and 0.5 mm titanium needles.
- Scienta Derma Roller – With well-designed microneedle rollers for both home and professional use, this brand come with different needle lengths, ranging from 0.5 to 2.5 mm.
- Dermaroller – The original roller, manufactured in Germany, has a variety of devices for both home and professional use, plus years of experience and positive reviews.
Stamps
Stamps use a flat head, which the needles are set into, rather than a rolling pin. Instead of rolling the tool across your skin, the areas to be treated are literally stamped. This device is better for treating smaller, distinct problem spots. There are both professional and at-home version of this device as well.
- Skinmedix Micro Needle Dermal Stamp – Designed for “intense, targeted treatment of acne scars, localized skin problems and hard to reach areas,” and “use on the delicate under-eye and peri-oral areas as well as along or above the hairline,” this device has 38 microneedles, offers a range of needle lengths, and offers a handy grip for better control and accuracy.
- White Lotus Dermastamp – This brand is designed for use on smaller areas of skin that require strong stimulation. It’s perfect for isolated scars and hair loss.
- New Spa Micro Needle Stamp – A simple design without any moving or replaceable parts.
- Derma Stamp by ReJuveness – This brand offers several different stamps with varying numbers of needles as well as different lengths.
Microneedling Pens
Pens are very similar to stamps, except they are motorized. Either battery-operated or plugged into the wall, these machines use a small motor to osculate the needles very rapidly. The movement is actually quite similar to that of Dr. Camirand’s tattoo gun.
These devices, particularly the professional versions, are also able to adjust the length of the needles, allowing practitioners to adjust the treatment to meet your unique goals. As with the previous devices we’ve discussed, there are professional and at-home versions of these pens as well.
- Dermapen – The world’s first microneedling pen is also a leading choice for both professionals and their patients.
- Dr. Pen Auto Microneedling System – Dr. Pen offers a wide variety of plug-in and rechargeable dermal pens, often with replaceable needle cartridges.
- Koi Beauty Micro Needle Electronic Pen – This brand has variable speeds, can adjust the depth that the needles penetrate, and often comes with replaceable cartridges, each with 12 needles.
Fractional Radio Frequency (RF)
Fractional RF microneedling devices use specially insulated needles that deliver high-intensity radio frequency energy into the targeted tissue once the needles have broken through the skin. This gives a uniform warming effect to the deep tissue, which helps to stimulate new collagen fibers to grow, leading to significant improvement to skin quality and texture.
Microneedling procedures using this kind of device are usually performed by professionals, although some portable, at-home versions are just starting to become available to consumers.
- Infini RF by Lutronic – With this device only the tips of the needles actually produce the radio waves rather than the entire needle, preventing your skin from becoming too irritated.
- EndyMed Intensif RF Microneedle – This professional grade handpiece advertises an “exclusive, smooth and fast operating mode” for ease of use and patient satisfaction.
- Thermage Portable RF Fractional Microneedle – A portable, at-home version of the RF microneedling device, this can be used on the hands, arms, legs, face, nose, lips, and eyes.
At-Home Microneedling: Pros and Cons
At-home microneedling presents numerous advantages. For starters, it’s a relatively inexpensive way to give you an instant glow, and over time it can help to plump, refine, and hydrate your skin. You might even notice your makeup going on more smoothly as your skin becomes more even in texture.
At-home microneedling results in much more shallow pinpricks than professional treatments, but the channels created are deep enough for anti-aging nutrients to find their way into the deeper layers of skin.
In fact, the main benefit of using an at-home microneedling device is that it greatly increases the quantity of active ingredients from topical creams that are absorbed by the skin. It’s so effective at this that it can increase the absorption of some nutrients up to 90%, making it ideal for halting the early signs of aging and preventing new fine lines or wrinkles from appearing.
Since at-home treatments are even less invasive than those performed in an office or medical spa, there’s virtually no downtime. You can do it an hour or two before going out to give yourself a pleasant glow.
The Dermal Roller: Advantages and Limitations
A dermal roller is, in the simplest terms, a small rolling pin covered in tiny needles. The pin rolls across the surface of the skin, leaving behind a trail of nearly microscopic punctures. The quantity of tiny puncture wounds created by a microneedling roller is much higher than those created by a tattoo gun, or any other method that’s been used in the past.
That said, the roller presents a number of its own limitations. Certain parts of the face and body need deeper punctures than others for the treatment to work, which has led to the development of multi-stage rollers. Dermal rollers also have a difficult time with hard to reach areas, like around the eyes and nose.
Lastly, dermal rollers have a tendency to tear at the surface of the skin when used incorrectly, causing pain and discomfort during treatment.
Some Important Advice
Even though the treatment is extremely safe, in order to achieve the best results there are still a few things anyone hoping to perform microneedling themselves should keep in mind.
- Remember to replace your needles frequently. Regardless of whether you use a roller, stamp, or pen, just like any razor, the needles will become dull over time. Dull needles are ineffective and increase your risk of infection. That means the more often you use them, the more often you’ll need to replace them. If you use your microneedles on a daily basis, you might need to change your needles as often as three to five times a week. If you don’t replace these dull needles you can damage your skin.
- Sanitize your needles before each and every use. This is essential to make sure you don’t spread harmful bacteria around your face or body. Start each session by cleaning your hands and face. Then, to minimize any chance of infection, dip your microneedles into rubbing alcohol to cleanse them. Be sure to rinse them off before using them; needling rubbing alcohol into your skin can be painful, irritating, and will absorb even more moisture out of your skin. Disinfecting your needles before and after each use will better ensure safe microneedling.
- Never microneedle over an acne breakout. Needling active acne can spread bacteria and cause a major infection. It’s better and safer to wait for your acne to clear before microneedling.
- If you’re going to try out a new serum, start with a patch test. The increased absorption that microneedling allows is incredibly beneficial. However, increased absorption can also mean excessive absorption of stronger serums, leading to irritation. To avoid this, just do a small patch test and wait 24 hours to see how your skin reacts.
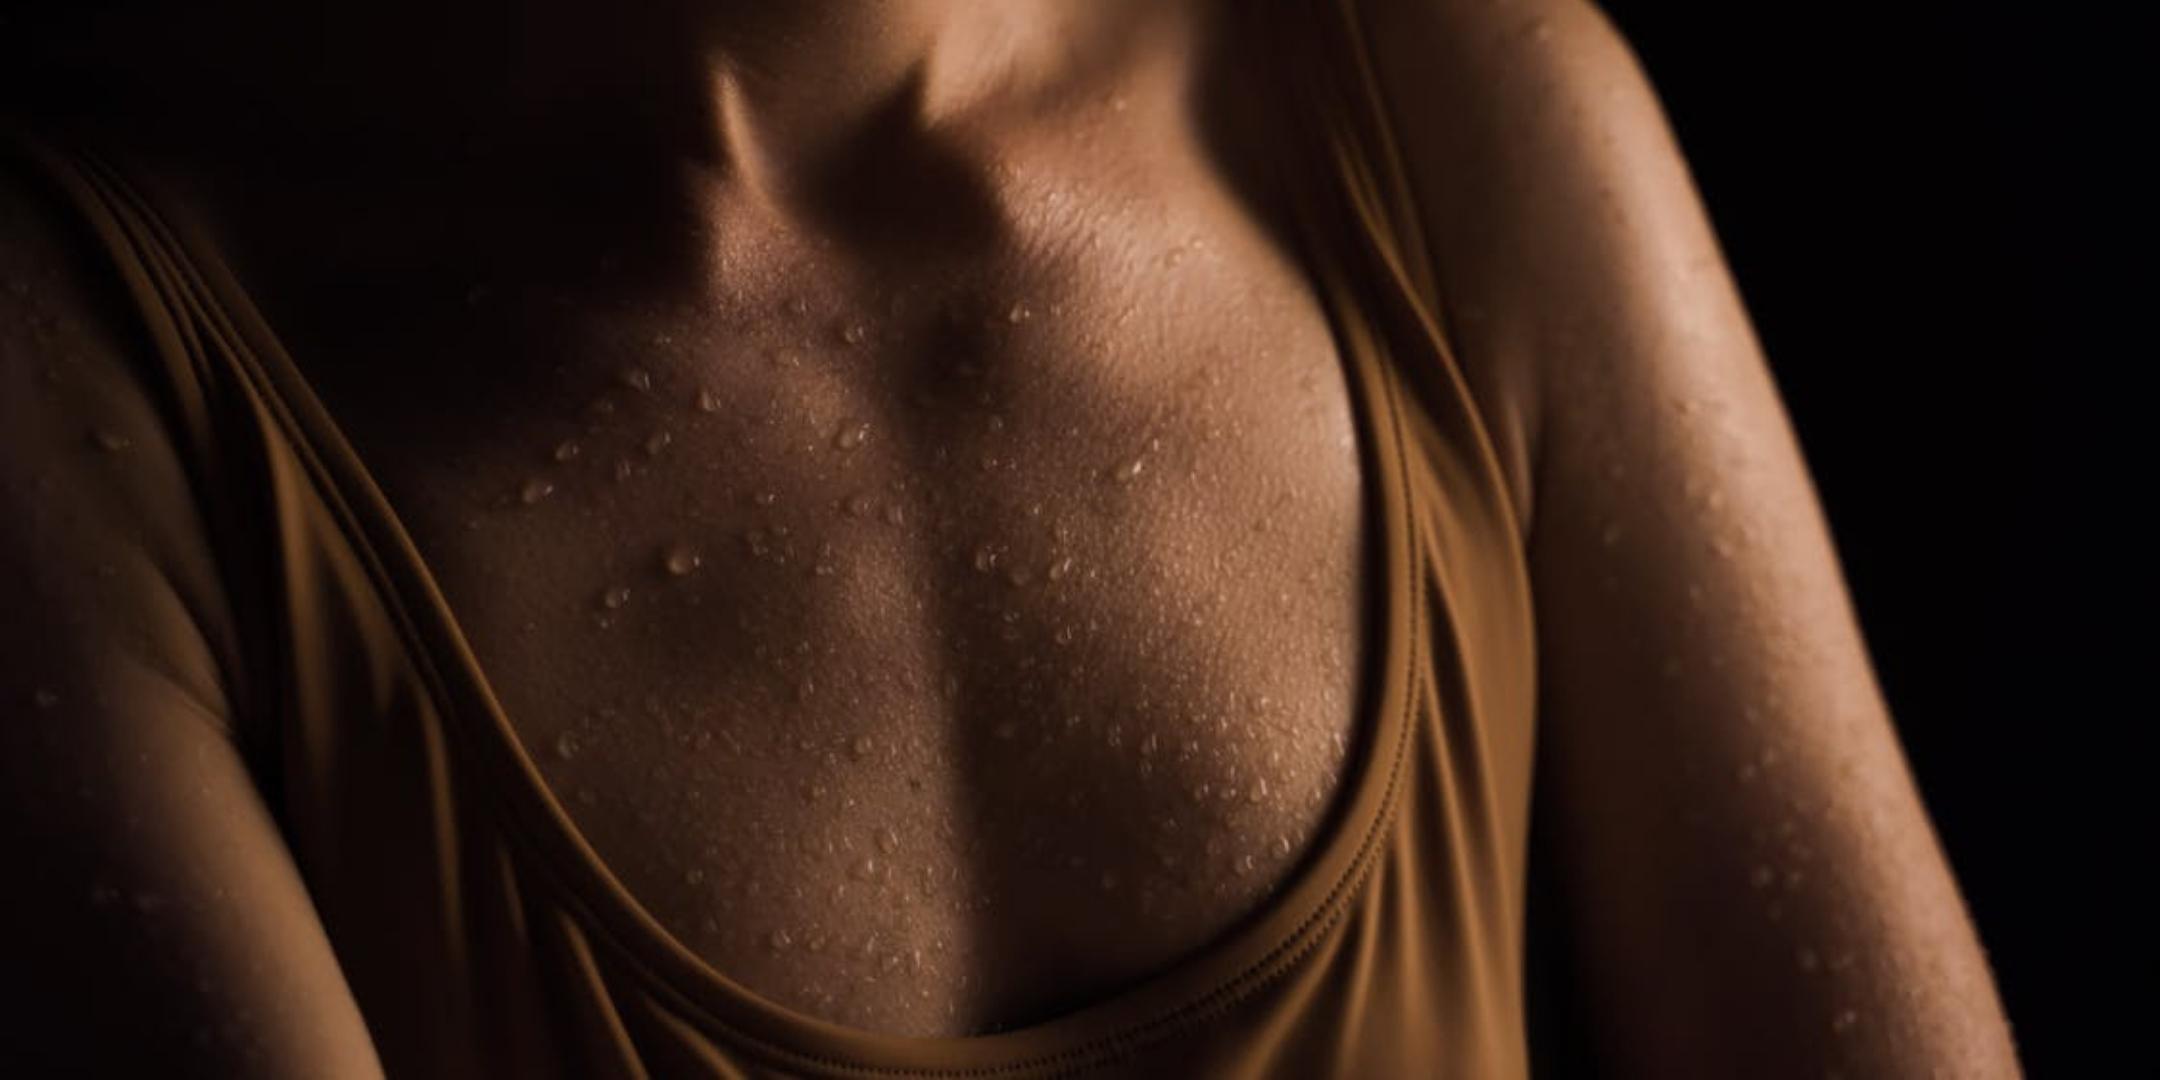
- Don’t forget your neck, chest, and the backs of your hands. These areas are often overlooked, but they can also be some of the first places on your body to betray you with early signs of aging.
RELATED: The Vampire Facial — Separating Fact and Fiction
Microneedling Preparation Tips
The ideal candidate for microneedling is anyone looking for a quick, painless, and effective way to improve the texture, tone, and overall appearance of their skin. To ensure you get the very best results from your treatment, here are a few tips you should follow.
- Meet with a skin care professional before your first microneedling session. It’s best to do this regardless of whether you’re performing the procedure yourself at home or having it done at a clinic. This is most important if it’s your first time experiencing microneedling. This simple consultation will help you better understand your skin’s needs and how microneedling enhances its appearance.
- Exfoliate your skin several times. Unless otherwise advised by your doctor, you should exfoliate every 2 to 3 days, and no less than 3 days before your appointment. This helps to remove some of the extra dead cells on the surface of your skin, making it easier for the needles to penetrate the upper layers of the epidermis.
- Eat plenty of fresh fruit and vegetables in the weeks leading up to your treatment. Maintaining a healthy diet is the best way to ensure your body is prepared for the procedure. Berries are an especially good source of antioxidants, which are great for your skin and help with the healing process.
- Start taking the recommended dose of skin-supportive vitamin supplements. These include vitamins A, C, E, and zinc. Aloe vera juice is also a good idea. These each work to support healing after a microneedling procedure.
- If you have a history of cold sores, you might have a flare up. Try using a lysine preparation, which helps with cold sores, prior to your treatment. You can also ask your doctor about taking antiviral medication.
- Stay hydrated. Drinking a lot of water isn’t only beneficial for your overall health, it also ensures your skin heals quickly, giving you that radiant, supple appearance. Microneedling can also rob your skin of its moisture, so drinking plenty of water before the procedure will help make sure your skin stays well hydrated.
- Begin and maintain a comprehensive skincare routine. Even though microneedling is minimally invasive, it will cause minor trauma to your skin, which is the point, after all. A comprehensive skincare routine not only helps to give your skin the strength it needs to endure the tiny punctures, it also makes sure you develop good skincare habits. After the procedure, you’ll likely be asked to apply certain topical products to aid with healing, so already having a good routine in place will help you stay on top of your aftercare.
- Avoid using harsh creams or lotions with retinoids. Stay away from products containing vitamin A, topical antibiotics, hydroquinone, or benzoyl peroxide for at least three days before your treatment. This will help to ensure that your skin will be in its best shape to handle the treatment, as well as recover from it.
- You should have a completely clean face when you begin treatment. Regardless of whether you’re doing it yourself at home or undergoing a professional procedure, the only lotion you can have on your face is a numbing gel should you be particularly worried about pain. Be sure to discuss this with your doctor prior to undergoing a professional treatment.
- Keep a close eye on the condition of your skin. Be sure to tell your doctor about any significant changes you notice leading up to your treatment. This might include a breakout, excessive dryness, or even sunburn.
Microneedling Aftercare
Directly after your treatment, you may look like you spent too much time in the sun and earned yourself a moderate to severe sunburn. Your skin might also feel warmer and tighter than usual.
These are normal side effects of the procedure that fade after an hour or two, and completely disappear within 24 hours. There might still be some minimal redness in spots after that, but even that will fade within a few days. The deepest needles might also cause some minor bleeding, swelling or bruising.
Within the first day or two following your microneedling procedure, you’ll likely notice your skin starting to flake and peel. This is due to the treatment speeding up your skin cells’ turnover rate, which is how quickly the dead cells are replaced by new cells.
Peeling usually lasts about a week, during which time you can use your normal skin moisturizer. Be sure to follow any additional instructions given to you by your doctor.
If your medical professional used a rolling device around your eyes, you might notice some micro-bruising in that area. This is normal and usually fades within 3 or 4 days. In the meantime, it’s easily covered up with your normal makeup.
Here are a few more things to keep in mind.
- A few hours after your treatment, it will be okay to wash your face with tepid water. Gently massage your skin and remove all serum and other material or debris. Try to be as gentle as you can; too much pressure can irritate your skin.
- Microneedling can make your skin sensitive to the sun. It’s best to avoid going out as much as possible for about 48 hours after your treatment, and use a strong sunscreen with an SPF of 30 or higher for at least 2 weeks after that. Even when you’re fully recovered, it’s a good idea to always use a sunscreen to improve the longevity of your results.
- Some people experience minor flaking (or peeling) a few days after their treatment. If this happens, it’s critical not to pick at your skin as doing so will inadvertently cause scarring or unsightly coloration changes. Either of these can result in more treatments than you had anticipated, or require an even more expensive and invasive procedure to correct the problem. Instead, use a gentle cleanser and a moisturizer until the flaking stops.
- After a microneedling treatment your skin may feel drier than usual. Be sure to drink plenty of water to rehydrate, and consider using a cream or lotion with hyaluronic acid. This ingredient helps restore moisture and balance to the skin. Locking in the moisture will help hydrate your skin from both the inside and outside.
- Don’t apply any makeup for the first 24 hours after your treatment as it can increase the risk of infection. Furthermore, don’t apply any makeup with a brush during your recovery, especially if it’s not immaculately clean. The chances of infection after microneedling are small, but dirty brushes raise that risk.
- The day after your treatment you can apply your normal makeup, lotions, and other products as usual. However, you should stay away from exfoliating products, or products with glycolic acids unless otherwise directed by your doctor. These can dry out and irritate your skin.
- Avoid strenuous or vigorous exercise for at least 12 hours after your microneedling treatment. Sweat often contains harmful bacteria, and with your skin in a low state of trauma, this could lead to adverse reactions, poor results, or even infections.
- Avoid “active” skincare products. You doctor will most probably advise you agiants the use of any products that contain alpha hydroxy acids, beta hydroxy acids, retinol (vitamin A), or vitamin C (in a low pH formula). This will ensure your skin has the best healing environment possible.
- Try eating fresh pineapple to speed up your recovery. Pineapple has many body-positive chemicals and nutrients that help skin to heal quickly and efficiently. One of the most important of these nutrients is bromelain, which helps bruises to heal quickly and sometimes even preventing them from forming in the first place.
- For the very best results, book repeat treatments 4 weeks after your initial session, and a series of 3 to 5 treatments in total. You’ll likely see some amazing improvements after just one session, but only by completing a full treatment cycle will you achieve your full goals.
Microneedling Results: What to Expect
Despite some initial redness and possible swelling, immediately after your treatment your skin should already look and feel tighter and refreshed. You might even see a slight plumping effect on your skin as soon as the swelling goes away.
Assuming your treatment involved needles of the appropriate length, your skin should start to increase its collagen production some 48 to 72 hours after your procedure.
Despite this increase, most patients don’t see real, noticeable results for at least 1 to 4 weeks after their first treatment. Full results from the first treatment can take as long as 2 months to appear.
While several treatments are usually required, you’ll likely see scar tissue shrink and a reduction of UV damaged skin, dark spots, and stretch marks after only one treatment. You may also see improvements in the texture of your skin as it grows thicker, firmer and healthier overall.
The new collagen that is produced will remain for a few years, making microneedling a treatment with excellent longevity, especially considering how simple it is. Of course, the effects of aging and sun exposure will still eventually take their toll, and at some point you’ll likely seek future treatments as part of your regular skin maintenance plan.

RELATED: The Buzz on At-Home Microneedling Kits
Microneedling Risks and Complications
One goal of every microneedling procedure is to create as little pain or discomfort for the patient as possible. Most patients tolerate the procedure amazingly well, although this is somewhat dependent on the area being treated and the severity of the problem.
Under most circumstances the treated area recovers very rapidly after skin needling. That being said, there are occasional microneedling side effects, including:
- Oozing and swelling
- Bacterial infections
- Herpes cold sores
- Milia cysts
- Mild acne flair ups
- Hyperpigmentation
- Surface bleeding
Under the care of an experienced professional, most of these risks are significantly decreased.
Frequently Asked Questions
How much does microneedling cost?
The final cost of your professional microneedling treatment will be dependent on your unique needs and goals. Many clinics offer a free initial consultation, during which your personalized treatment plan will be put together and the pricing discussed.
Speaking in general terms, you can expect a single session to cost anywhere between $300 and $500. Most patients require 3 to 5 sessions, however, many clinics offer discounts for patients purchasing multiple sessions.
On the other hand, some people prefer to perform microneedling on themselves, rather than pay a professional. While this limits some of the benefits of microneedling, it also considerably lowers the price. The price of home microneedling systems vary considerably, with the most basic rollers starting at $20, while other portable RF microneedling kits can cost as much as $600.
The advantage with a home system is that you only make a costly investment once, then simply buy replacement needles as you need them. However, the results may not be as dramatic as what you would get from a professional.
How common are post-treatment infections?
Though the possibility exists, infections after microneedling are very rare. This is because even though there will be dozens, if not hundreds, of tiny little holes all over your face, they’re so small that they usually close up in less than an hour. You should still follow hygienic practices after your treatment, though.
What’s the difference between a chemical peel and microneedling?
The simple fact is that these two treatments are about as different as two skincare treatments can get, while providing similar results. Yes, both are non-surgical and designed to improve your complexion, but that’s where the similarities end.
A chemical peel acts as an exfoliant, physically removing the outermost layer of skin. This in turn encourages the lower layer to come to the surface, resulting in smoother, more evenly toned and all around better looking skin.
On the other hand, there’s virtually no downtime after even the deepest of microneedling treatments. Microneedling merely pierces through the outermost layer of skin, rather than remove it entirely. This means microneedling carries a significantly lower risk of infection.
Both treatments are highly effective. A candid discussion with a board-certified medical professional will help you to decide the best approach for your specific cosmetic goals.
Should I use a chemical peel or microneedling for my large pores?
There are a number of different strength chemical peels that are quite effective at exfoliating the skin. Salicylic acid, glycolic acid, lactic acid, and medical grade peels like a TCA peel all help to unclog pores and remove extra oil, dirt, and other debris.
What’s more, the increase in collagen that deeper peels offer can help plump up and thicken the skin, further helping to reduce the appearance of large pores.
Of course, the downside to using a chemical peel to treat your pores is the sometimes lengthy downtime and recovery period that can come with deeper peels.
Microneedling, on the other hand, is also an effective treatment to improve skin texture and pore size, without any real downtime to speak of. Without needing to remove entire layers of it, microneedling will also stimulate your skin so it starts producing more collagen. This in turn gives your skin more structure and elasticity, helping large pores look much smaller and less apparent.
Each of these treatments are very different and come with their own benefits and side effects. The procedure best suited to your needs can really only be determined by speaking to your doctor.
Which is better, microneedling or laser resurfacing?
Again, each of these non-surgical treatments increases your skin’s natural production of collagen by creating micro-injuries to the skin. Both procedures work well to treat acne scars, open pores, pigmentation problems, or simply reduce the appearance of wrinkles. Of course, they treat these respective issues in very distinctive ways.
The most apparent difference is how the micro-injuries are created. Laser resurfacing uses light energy to create these injuries while microneedling employs a much more mechanical approach, literally piercing the skin. The laser burns the outer layer of skin, creating small pits which vary in size and depth depending on the type of laser used.
On the other hand, most microneedling uses no heat at all. This means it has a much shorter downtime, less pain, reduced redness post-treatment, and a much smaller risk of scarring, infection, and post-inflammation skin darkening.
Another major difference between these two treatments is that while almost anyone can undergo a microneedling procedure, laser and other light-based treatments are not appropriate for all skin types. In fact, there are rather strict limits on laser treatments for darker skinned people.
Overall, microneedling is by far the more accessible of the two treatments, with far fewer risks involved. Be sure, however, to talk to your doctor to find out if it’s the right procedure for you.
Does microneedling hurt?
The shortest needle lengths shouldn’t produce any pain at all, and for deeper needles most practitioners provide their patients with a numbing agent. This allows them to go as deep as they need to with the needles.
Afterwards you can expect your skin to be a little pink, and in a worst case scenario you could be left with a few tiny puncture scabs that will fade over a few days. Pain following the treatment is rare, but easily controlled with over-the-counter medications.
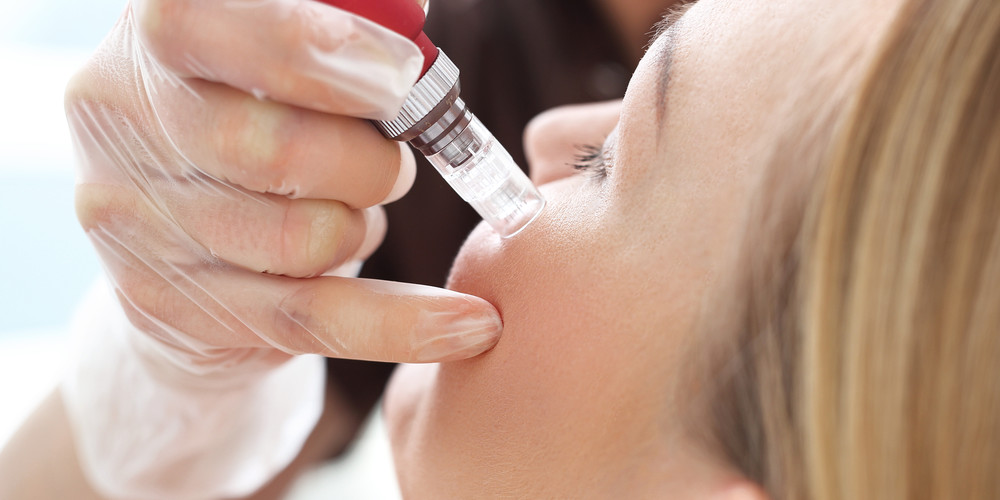
What does a professional procedure involve?
When performed by a professional, microneedling begins with cleaning and possibly numbing the skin with a topical anesthetic. Numbing is only done if you have a low pain tolerance. Generally, it’s not necessary.
Often a collagen-stimulating product, vitamin C serum, and/or a skin lightener is applied to the skin’s surface. Then, using the microneedling device of their choice, the skin is punctured with tiny wounds, created in the uppermost surface of the skin. The speed and adjustability of the needles makes piercing the skin easier and increases your skin’s ability to absorb any serum that was put on your face. A vitamin C serum or hyaluronic acid is usually used after the procedure to re-hydrate, heal, and protect the skin.
What will I look like after the treatment?
The average person will see some redness and mild swelling in their face right after treatment. This can even resemble a sunburn and last for 24 to 48 hours. It’s important to keep your skin protected from the sun while you recover. There might also be some slight pinpoint bleeding or bruising if your treatment involved needles that were on the longer end of the scale.
These symptoms should all fade quickly, and you should notice smoother, more radiant skin within a week or two. Your skin will continue to experience the effects of a treatment for the entire time your skin remodels itself.
How do at-home microneedling systems compare to professional treatments?
A useful way to think about the differences between at-home and professional treatments is to think about going to the gym. Hitting the gym by yourself and getting in a good, solid workout a few times a week is great for your body and general health. That’s similar to what using an at-home microneedling system is like. It’s easy, and you can see some pretty amazing results over a long period of consistent use. However, if you’re doing the wrong exercises or doing the right exercises incorrectly, you could be causing yourself more harm than good.
On the other hand, going for a professional version of the treatment like going to the gym and working with a personal trainer. You get much more dramatic, longer lasting results, faster than you could get alone — and more effectively, too.
How long do at-home systems last?
The lifetime of your at-home microneedling system will ultimately depend on its quality.
Low or poor quality tools typically lose their effectiveness faster. If you did your research and purchased a high quality system, with proper care it should last at least six or eight months before needing replacement needles. Medical-grade needles won’t wear out as fast as their cheaper counterparts, but even they will eventually become dull and blunt, not unlike how even an expensive razor eventually loses its edge.
What type of disinfectant should I use for my at-home microneedling system?
Most disinfectants found in the first-aid section of your local supermarket or pharmacy are appropriate. Just be sure to select something that is at least 70% alcohol to make sure your needles are fully sanitized. Follow the care instructions of your system, which should be included at the time of purchase.
How often should I get it done?
That would depend on the severity of the problem you’re treating. If your skin is generally smooth and you care for it well, you can microneedle every 3 to 6 months to maintain your appearance. However, someone with dramatic acne scarring should plan on a session every month for 4 to 6 months to see the best results. After that, you can go in for a touch-up once a year, or microneedle as often as you feel your skin will benefit from it. Most people start to see results after their very first treatment.
Who can perform medical microneedling?
For any of the longer length needles that penetrate into the dermis, only board-certified medical professionals should perform the treatment. Medical-grade rollers, stamps, or pens should only be used by qualified professionals. This because they are more intense, thus presenting a higher risk.
What are the benefits of microneedling?
The benefits are remarkably far-reaching. For one, the tiny puncture wounds produced by the head of the tools greatly improve your skin’s ability to absorb topical skincare products and helps them work better.
Microneedling also stimulates blood circulation and collagen production in the treated area by over 1,000%, according to some estimates. And when compared to many harsher, more invasive and expensive treatments like chemical peels, laser resurfacing or dermabrasion, microneedling is incredibly cost effective.
Additionally, unlike some other treatments, microneedling works well on all skin types and can be used to treat the body, face, around the eyes, mouth, neck and even the scalp.
Microneedling has been proven to significantly improve the following skin problems:
- Rough skin texture
- Wrinkle
- Fine lines
- Crow’s feet
- Laugh lines
- Surgical scars
- Acne scars
- Chicken pox scars
- Large pores
- Sun damaged skin
- Aging skin
- Stretch marks
Can microneedling be combined with other procedures?
Absolutely! Microneedling is a minimally invasive treatment combinable with any number of cosmetic procedures, among them botox, injectable fillers, chemical peels, laser resurfacing, microdermabrasion, and other traditional cosmetic procedures.
These procedures can often even be combined into a single treatment session. For example, laser resurfacing with a carbon dioxide laser can be combined in the same sitting with microneedling for the treatment of acne scars. However, not all practitioners recommend that they be done on the same day. Your practitioner will let you know if it’s possible.
On the other hand, combining and alternating between microneedling treatments and a 35% glycolic acid chemical peel every three weeks has been shown to be an incredible regimen for treating both superficial and moderately deep scars. This combination has also shown an improvement to skin texture and helps fade post-acne discolorations.
The best way to find out if you should be combining procedures for a more complete result is to speak with your doctor.